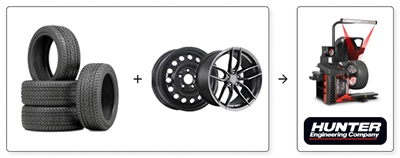
How to install your own set of tires and wheels

Changing your tires is not impossible if you already have rims or wheels attached to your tires. Although it usually only takes a few minutes to install your kit on your vehicle, it's essential to follow the steps carefully because the tires and wheels will be used for thousands of kilometres.
Check the characteristics of your tires
If you have chosen directional and/or asymmetric tires, before installing them, make sure that each tire and wheel is in its final position on your vehicle.
To avoid mistakes, place each wheel and tire around your vehicle the same way race teams do for pit stops.
Directional and Asymmetric Tires
First, look for the rotation arrow marked on the tire's sidewall. The arrow indicates the direction in which the tire should turn. Next, look for the "Side Facing Outwards" mark and the rotation arrow to determine the right side the tires are being installed on the vehicle.
Start the installation
It is always best to consult your vehicle's owner's manual for the proper procedure for removing tires and wheels.
Step 1: To remove your old wheels and tires, loosen the nuts before lifting the vehicle. Check the owner's manual for the proper location if necessary. An improperly placed jack could damage the vehicle and cause injury. We recommend that you use hand tools only.
Step 2: Jack up your vehicle slightly and support it with jack stands (if available). Check your owner's manual for the proper location of the jacks if necessary. Be sure to use the jack and jack stands only on a flat, level surface when working on your vehicle. Remove your old wheels and tires.
Step 3: Remove the lug nuts and place them nearby. Check the condition of the vehicle's bolts and studs as you remove the wheel from the hub. If you have any questions, contact PMCtire customer service. Ensure both contact surfaces are clean before placing the new wheel and tire on the hub.
Step 4: Check the fit of the wheel on the vehicle hub. To ensure the thread size of the nuts or bolts matches that of the vehicle, first install the nuts or bolts without the wheel. If you feel resistance when doing this, inspect the stud and nut (or hub and bolt) for clean threads or obstructions.
Some wheels may require a centering ring to fit the hub correctly. The wheel bolts must match the diameter of your vehicle, and the wheel must be in complete contact with the hub contact surface. The wheel bolts must match the diameter of your vehicle, and the wheel must be in complete contact with the hub contact surface. If the wheel does not match your vehicle's bolt diameter, or if the wheel is not in full contact with the mounting surface, please contact our customer service department.
Step 5: For the following checks, it will be necessary to temporarily install the wheel by tightening the lug nuts or bolts by hand to check the disc brake caliper clearance. It would be best to have at least 3-4mm of clearance between your wheels and the vehicle brakes.
Step 6: Put your vehicle's transmission in neutral and turn each wheel by hand, making sure the outer edge of the disc brake caliper does not touch the inside of the wheel or the side of the caliper does not contact the back of the wheel.
Step 7: Tighten the bolts crosswise with a torque wrench to the torque specifications in the owner's manual. This will distribute the stress on the wheel and position the wheel evenly on the hub.
Be careful because over tightening a wheel can break a bolt or the stud or distort the wheel, brake rotor and/or drum.
Step 8: Before driving your new tire and wheel assembly, be sure to set the correct tire pressure for your vehicle. The values are listed in your owner's manual or on the door frame of your car. If necessary, after driving 90 to 160 km, check and tighten the bolts. As soon as possible, have your mechanic check the bolts for tightness.


